How to Setup a New Google Maps API Key
Google Maps is an incredibly powerful tool for businesses worldwide, enabling them to integrate maps, geolocation services, and place searches into their websites and applications. Whether you're developing a location-based service, enhancing your customer's user experience, or simply displaying your business location, Google Maps APIs play a crucial role in connecting your services with the vast data Google Maps offers.
Renato
This guide will walk you through creating a new Google Maps API key and adding specific features like Maps, Places, and Geolocation APIs to it. Not all projects require all these features, so we'll cover how to customize your API key according to your needs.
Step 1: Access the Google Cloud Console
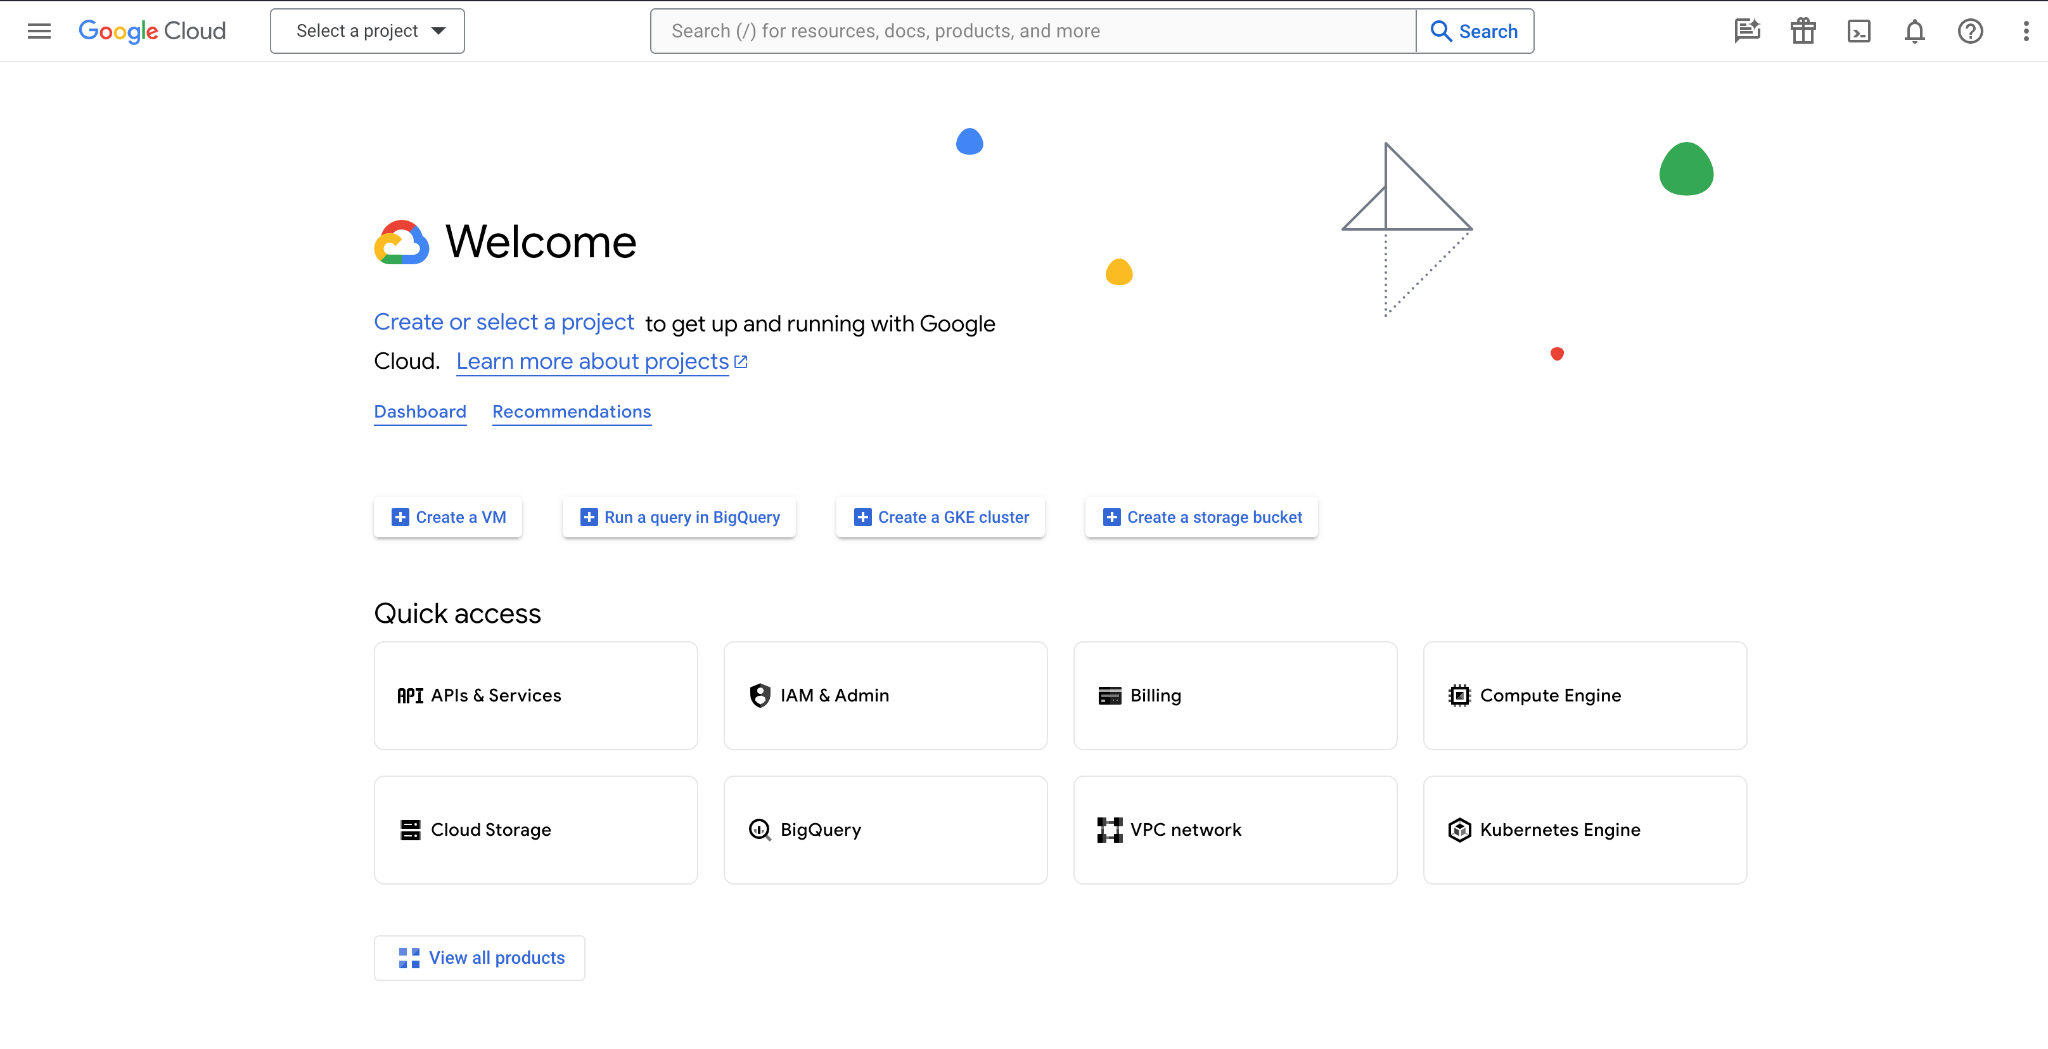
The entire process takes place within Google Cloud Console. To access the Google Cloud Console, you can follow this link: https://console.cloud.google.com/. You will need to log in with your Google account. If you don’t have one, you will need to create it.
If you don’t have a Google account and need to create it, you can follow the steps on the following link: https://support.google.com/accounts/answer/27441?hl=en.
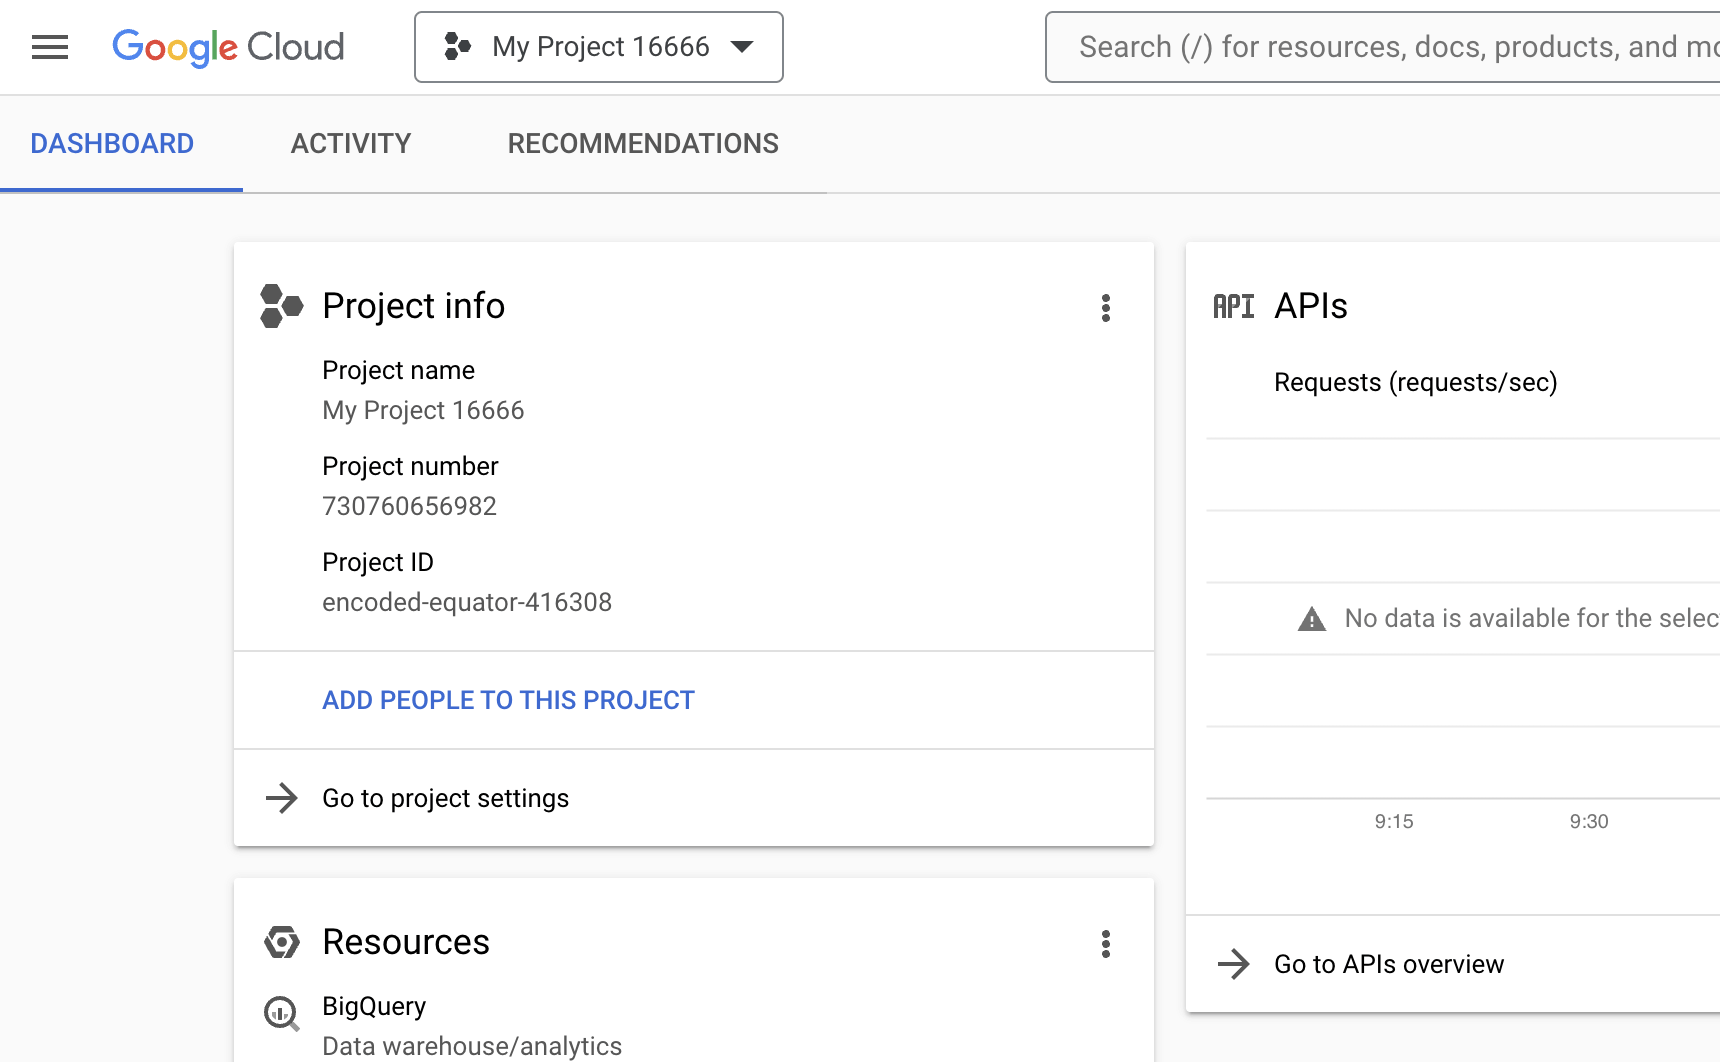
When you open the Console, you should see a screen similar to the one below. If you’re opening it for the first time, it might ask you to accept the Terms and cookies.
Step 2: Create a New Project
Once logged in, you’ll need to create a new project for your API key.
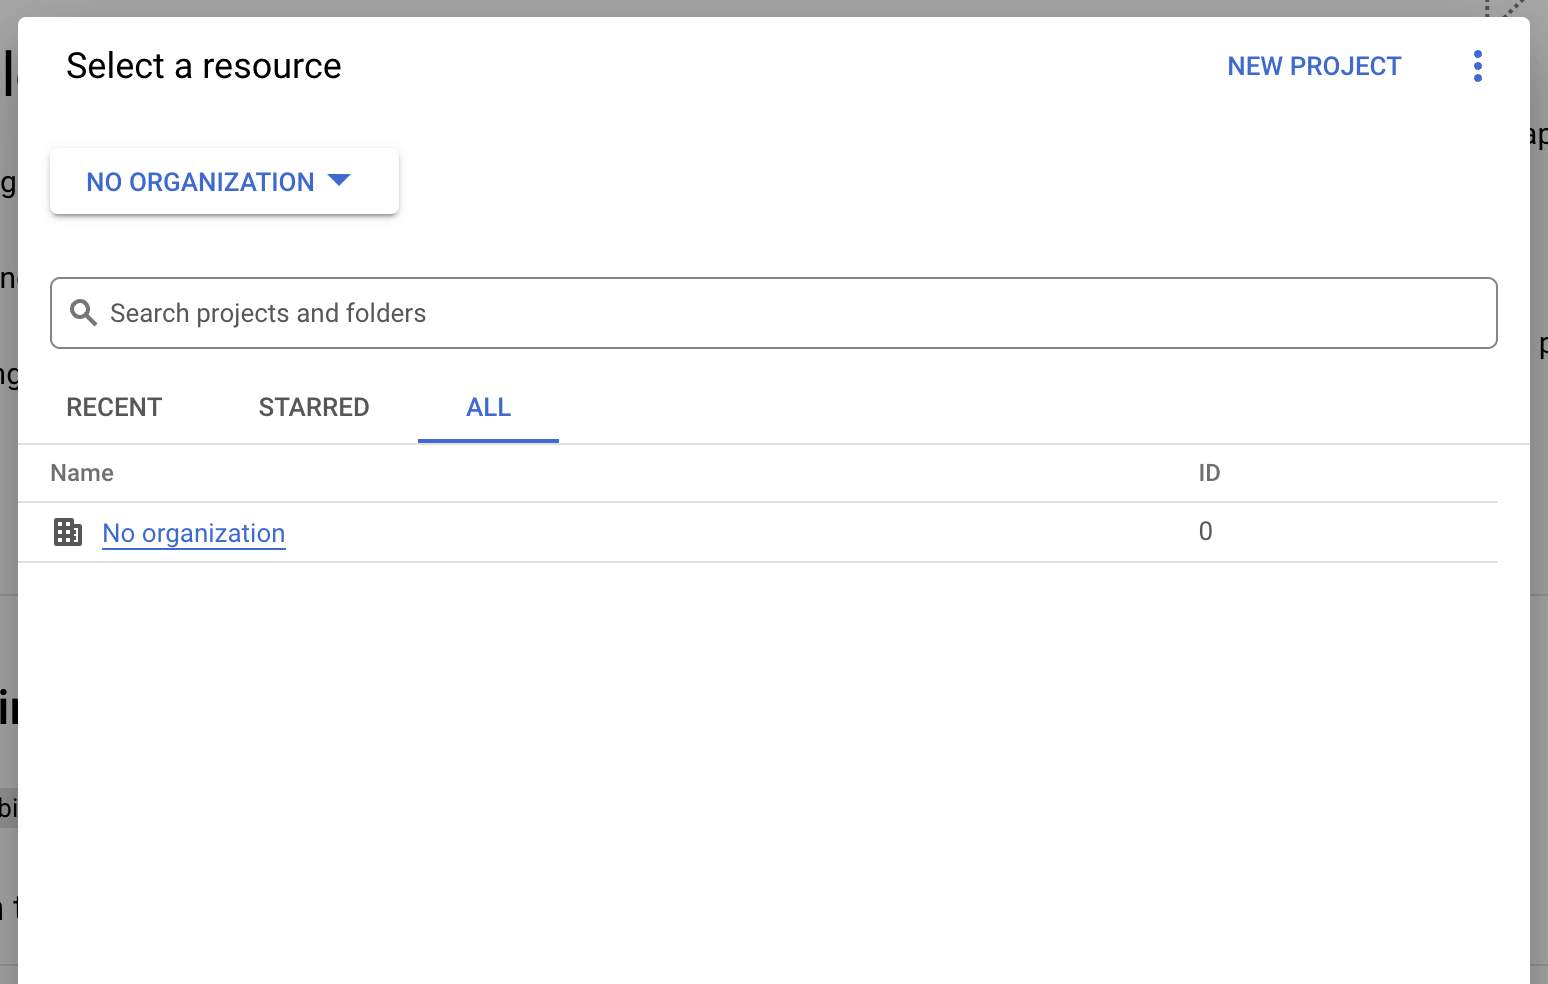
Click on the project dropdown at the top of the page labeled “Select a project”. If you have any projects from before, it might default to it, so instead of seeing “Select a project”, you might see a project name.

A modal should appear. At the top right corner of the modal, click on NEW PROJECT.
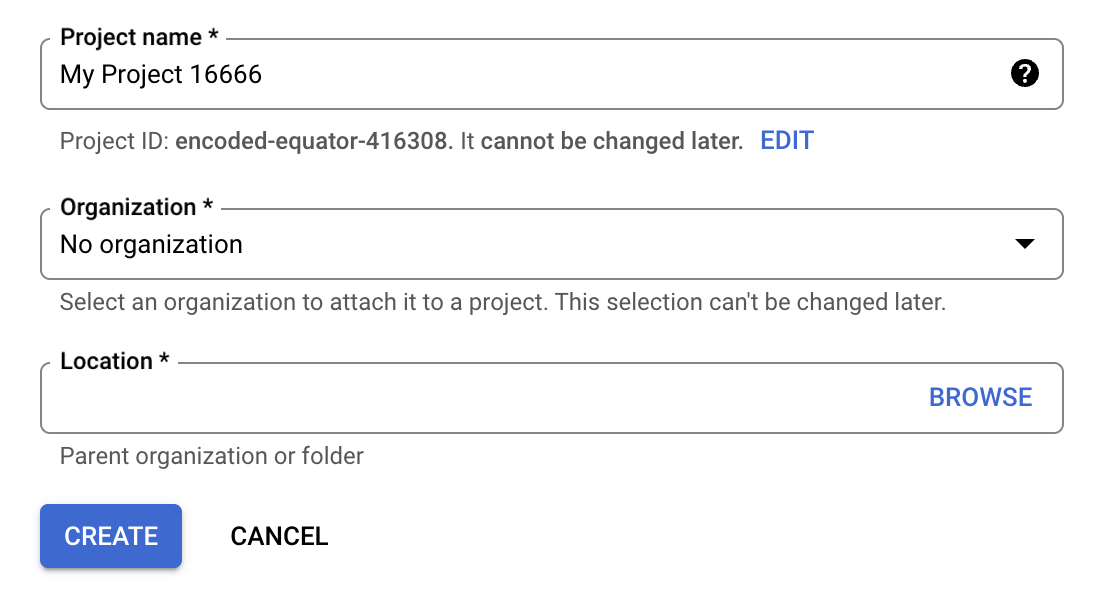
Give your project a name, select an organization (if you have it) and provide a location. At this stage, the name is the most important part on this screen. After you fill in all the required fields, click on CREATE.
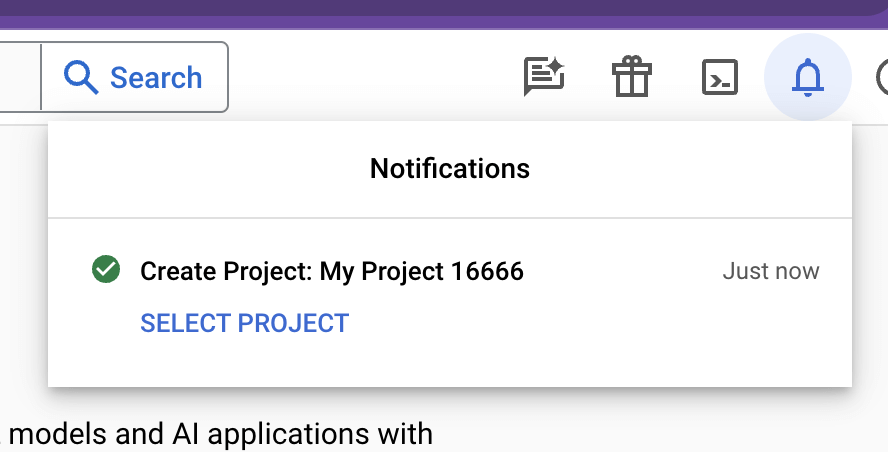
You should be redirected back to the Console. A notification pop-up should show your project being created and after it’s done, it should show a success. Click on SELECT PROJECT in the pop-up to select the project.
You should now be redirected to the project screen. If, for some reason, the notification from point 4 didn’t show up, give it a few minutes, reload the page, and select the project from the dropdown from point 1.
Step 3: Create the API Key
Now that your project is set up, you can create the API key. It can be created from multiple locations.
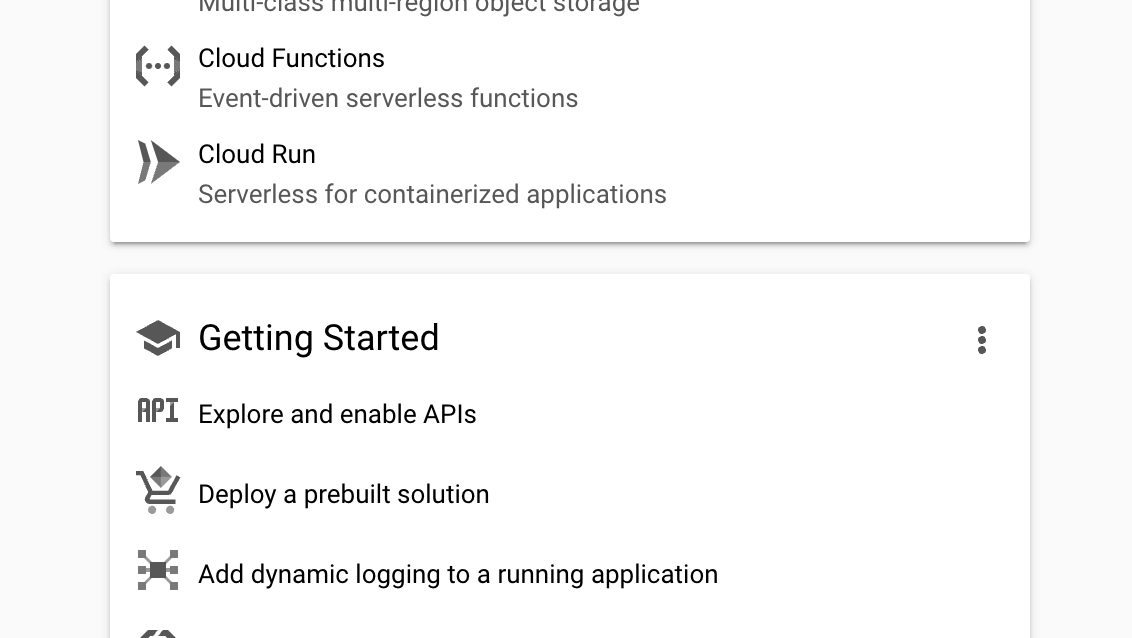
If you’re on the project screen from Step 2, you can scroll down a bit to the Getting Started section and look for Explore and Enable APIs.
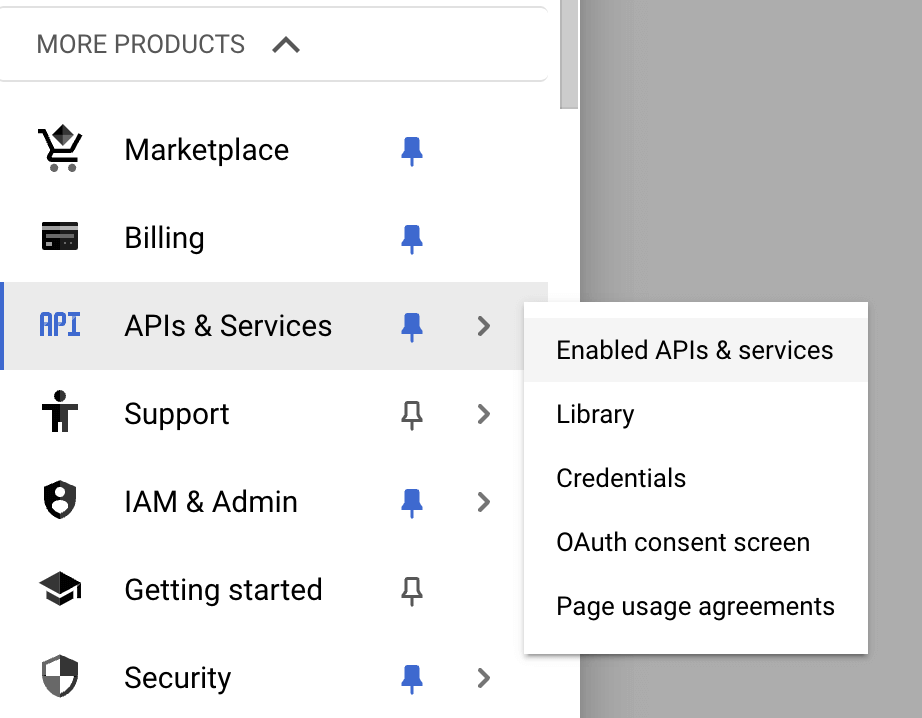
Another way is to click on the menu in the upper left corner to open the left sidebar. In the sidebar, if it’s not pinned by default under PINNED PRODUCTS, look for APIs & Services under MORE PRODUCTS. Hover over it and click on Enabled APIs & services.
Either way, you should now be redirected to the APIs screen.
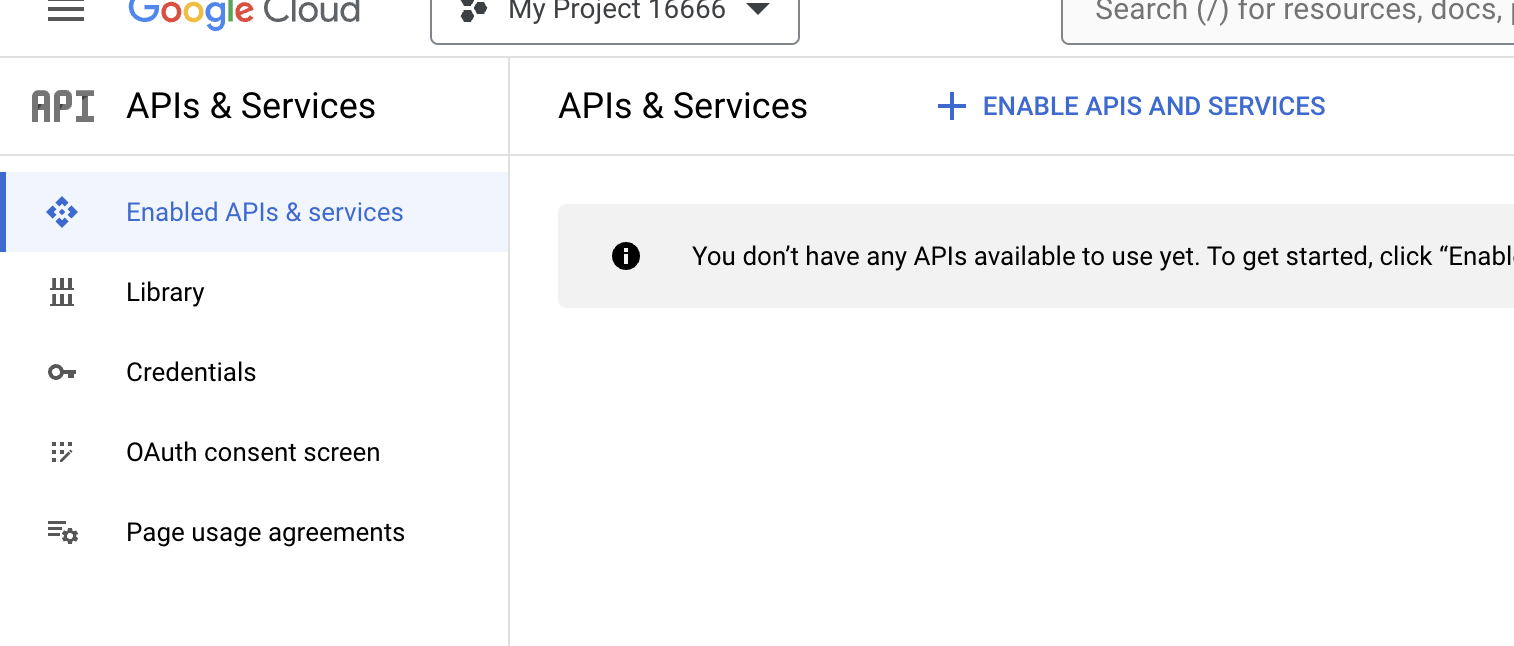
From this screen, do the following:
Click on + ENABLE APIS AND SERVICES. You should be redirected to the API Library screen.
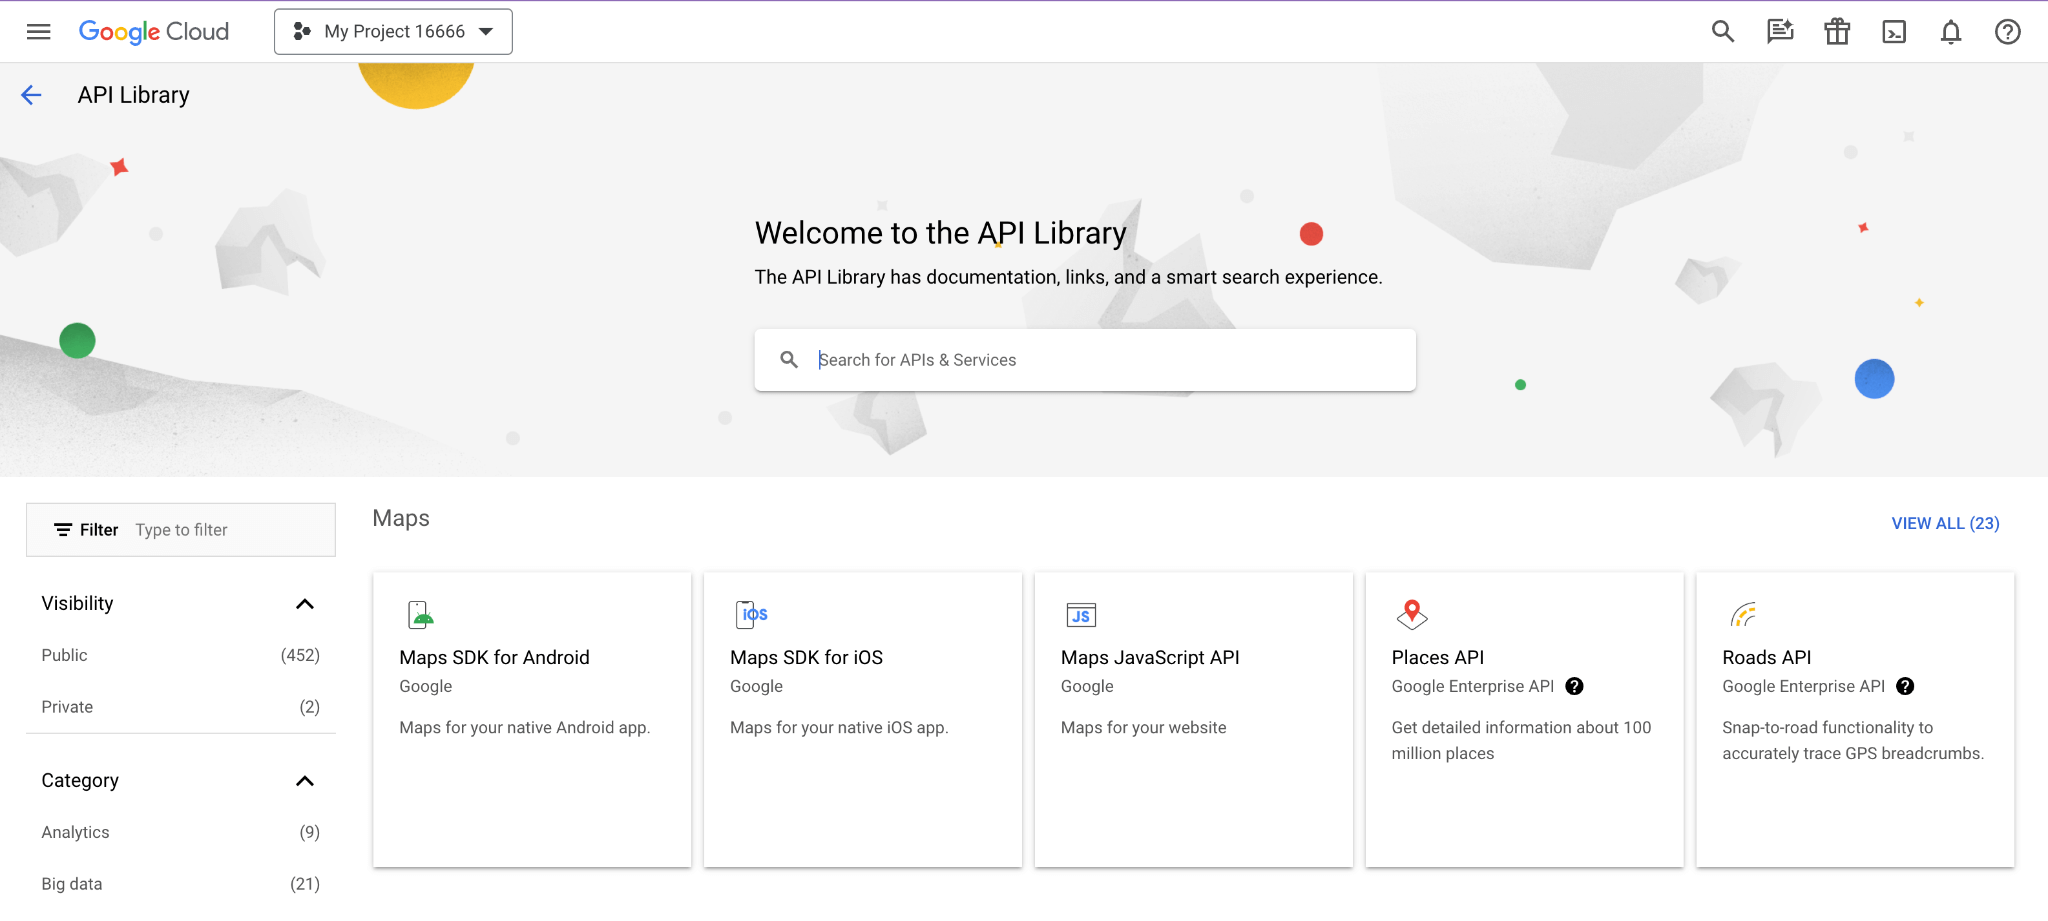
The essential API for adding maps to web pages is the Maps JavaScript API. Click on it. It should redirect you to the Maps JavaScript API screen.
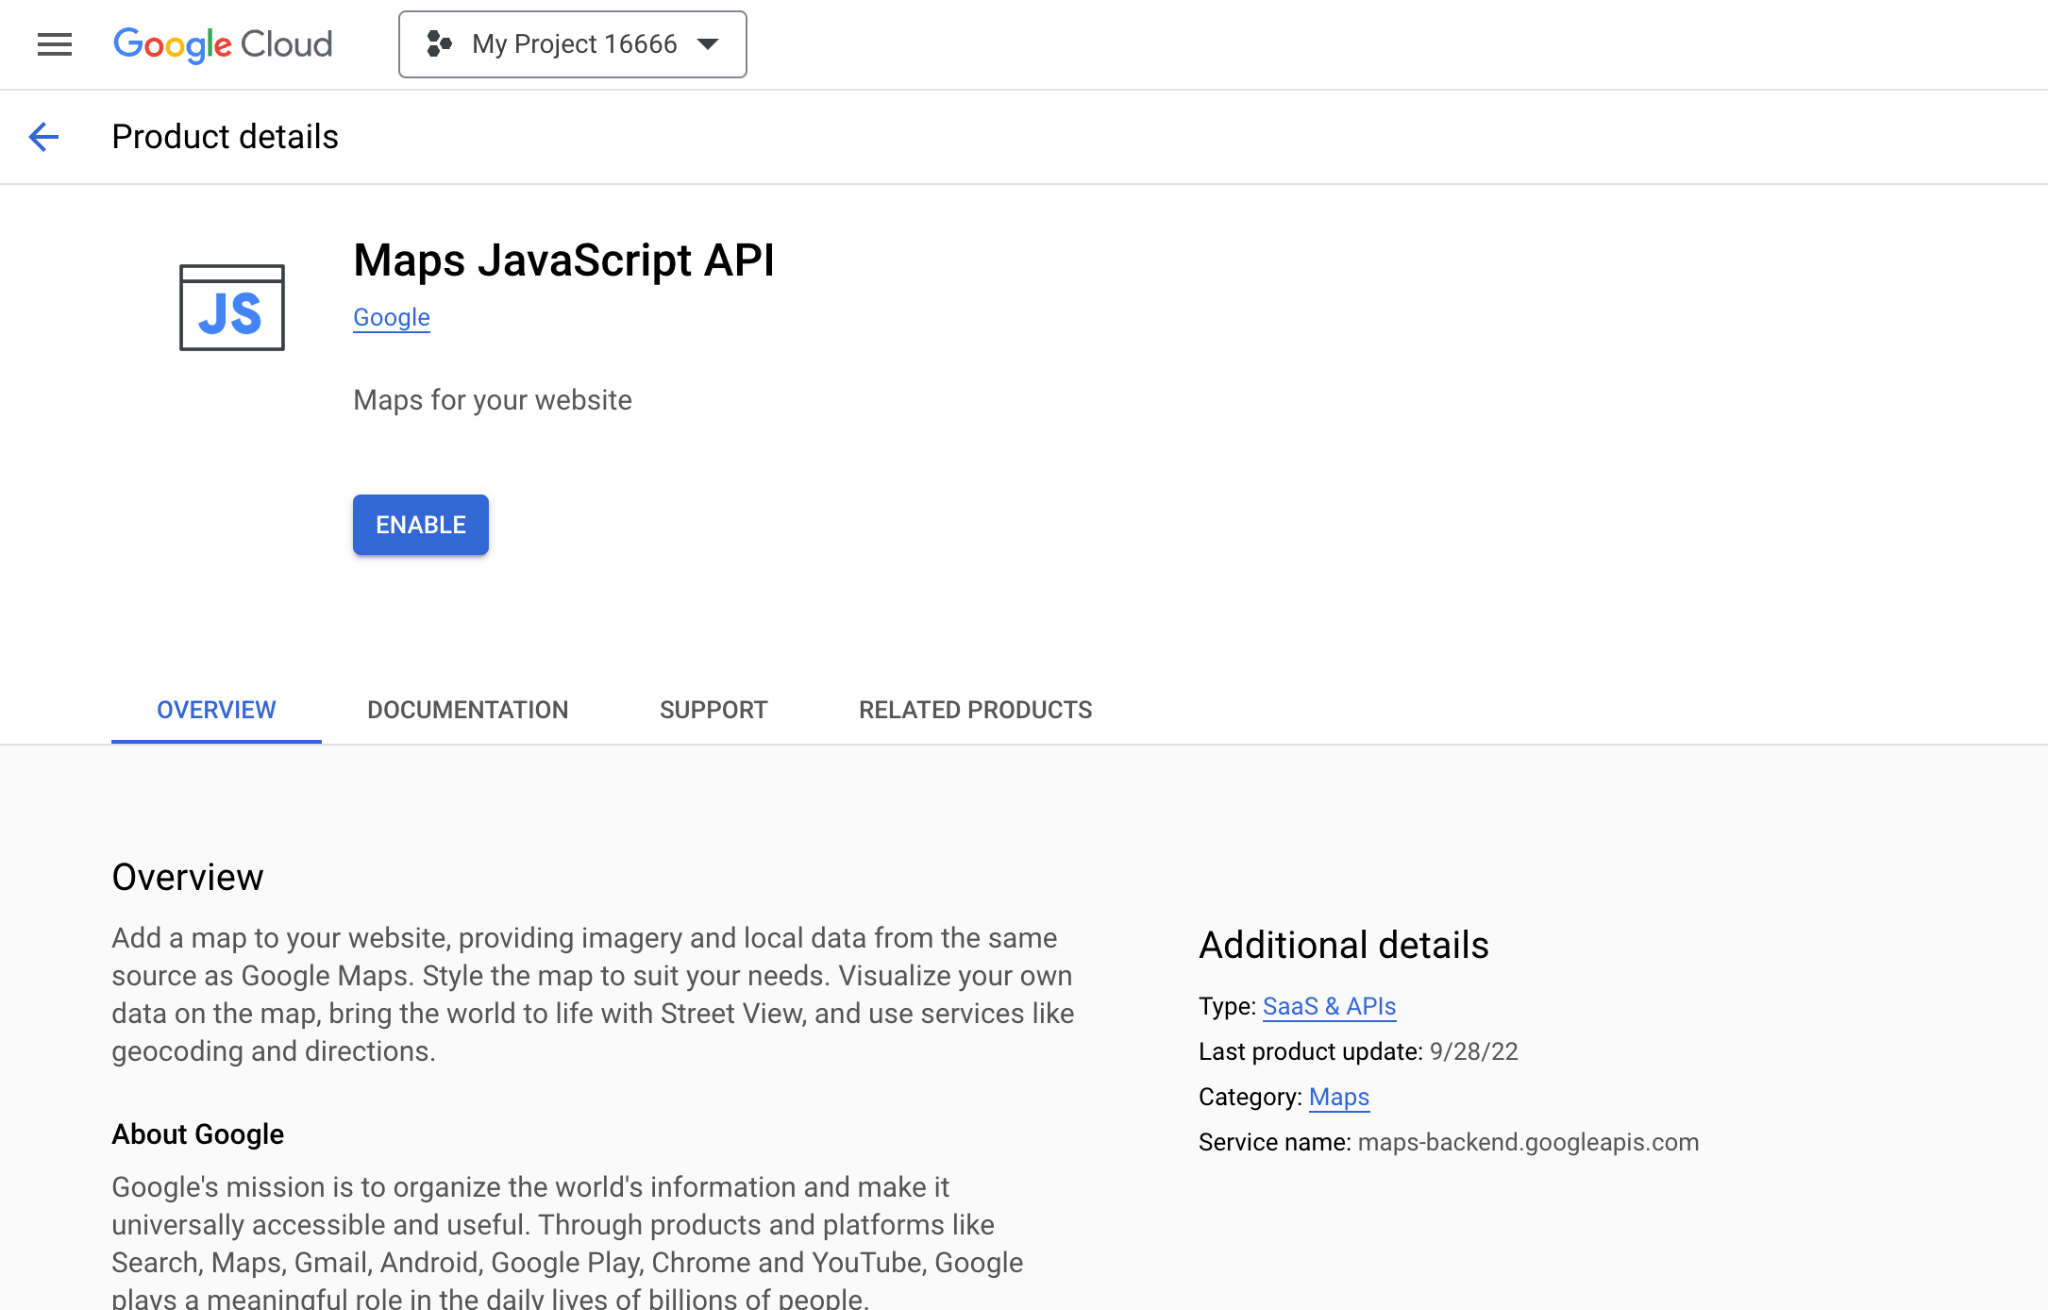
Click on ENABLE to enable this API. It will ask you for certain information, like country, etc. After filling all the data, click on AGREE & CONTINUE. Next, it’s going to ask you to provide information about your account type, address, contact info, etc. After filling all the information, click on START FREE. This will ask you for credit card information in order to use the services. Also, you’ll need to verify it’s a legit credit card. Don’t worry, they won’t charge you anything.
After you complete all the verification steps, go back to the APIs & Services screen. It should look a bit different now. It should show the enabled Maps JavaScript API.

Click on the Maps JavaScript API in the table. A modal should appear with some questions about your business, development experience, etc. After you fill those fields, another modal should appear with your API key.

We recommend disabling the first option, Enable all Google Maps APIs for this project, in order to select only the ones you want manually. If you want to use all the APIs out of the box, leave this option selected. Make sure to store the API key somewhere so you can refer to it later. Once you stored your key, click on GO TO GOOGLE MAPS PLATFORM.
A modal should open with restrictions. We recommend selecting HTTP referrers (web sites) option.
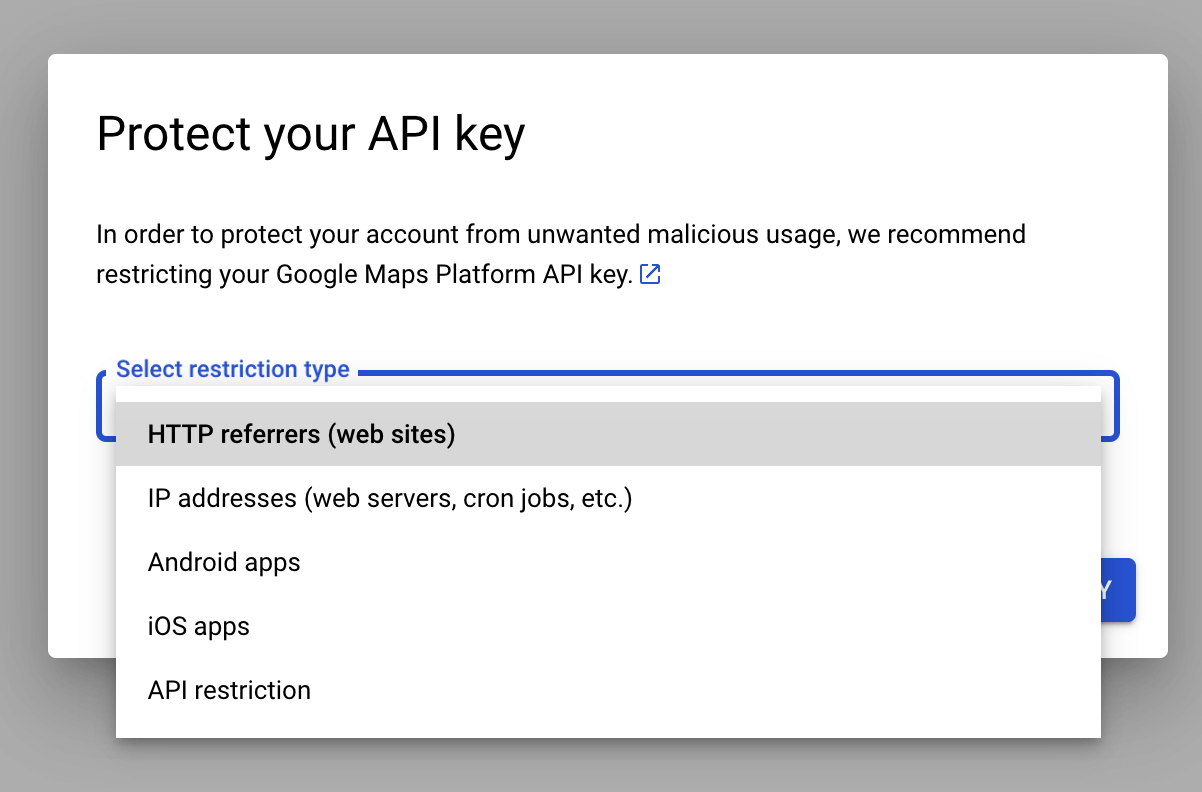
A modal is going to add another field in which you want to add your website’s URL.
That’s it. Your API key is ready. If you didn’t store your API key, don’t worry, you can access it from the Google Maps Platform. On the Google Maps platform, click on Keys & Credentials in the left sidebar and click on SHOW KEY in the table, next to you Maps API Key. A modal is going to open with your key.
To quickly access Google Maps Platform, you can try using this link: https://console.cloud.google.com/google/maps-apis

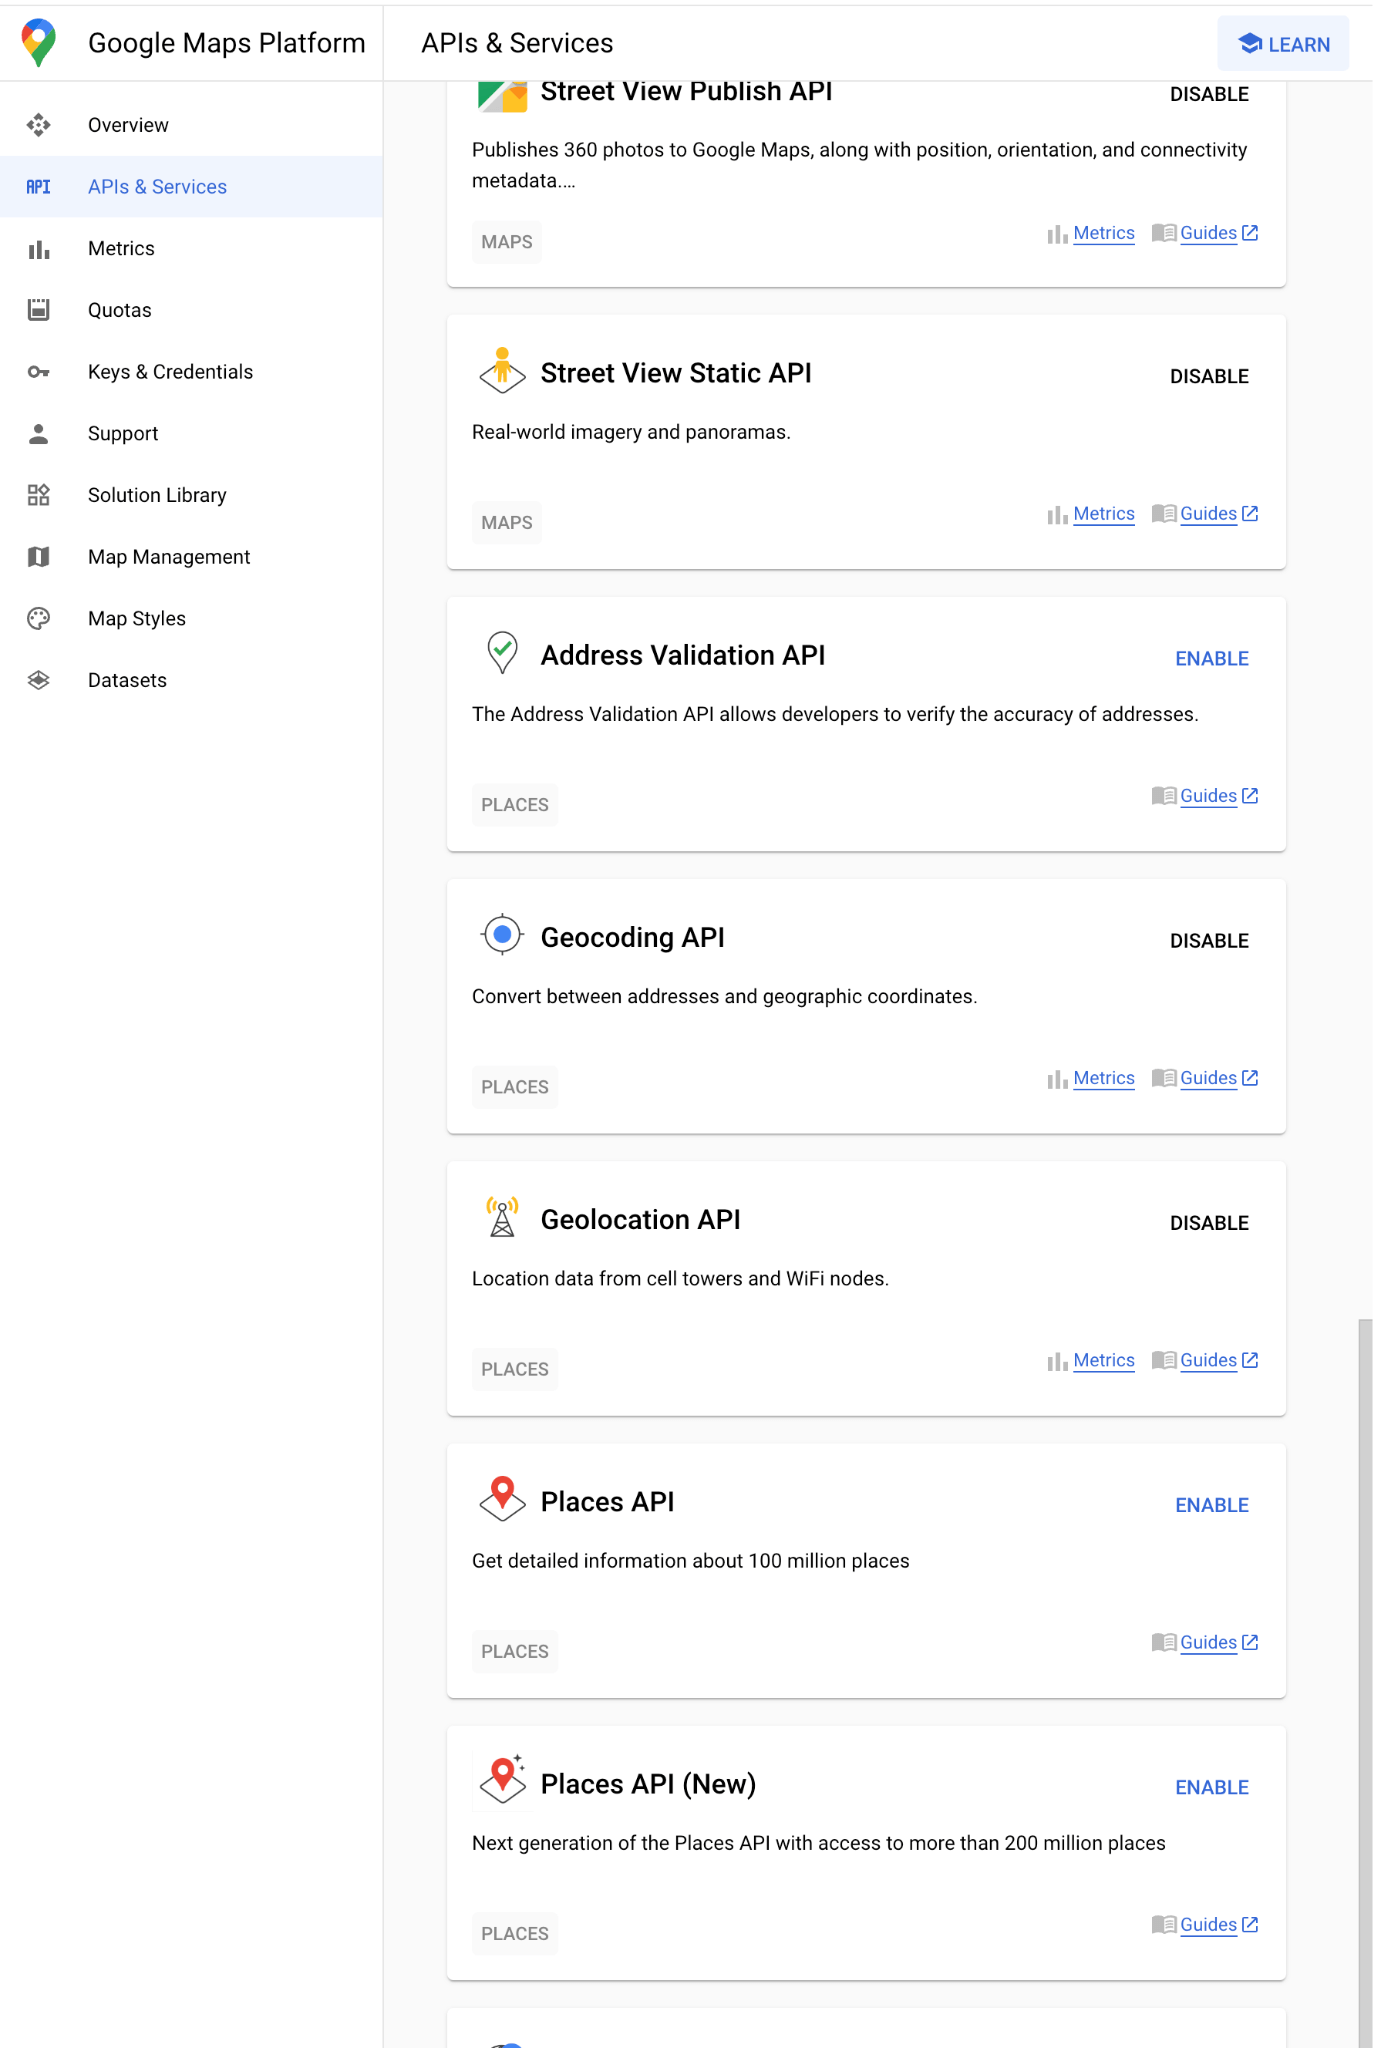
Step 4: Enabling different APIs (e.g. Places API, Geolocation API, etc.)
Enabling different Google Maps APIs is relatively simple. In the Google Maps Platform, click on APIs & Services in the sidebar. From here, look for the APIs you want to enable and click on the ENABLE button in the card’s upper right corner. It’s going to take a few seconds and enable the selected API.
Conclusion
You've now successfully created a Google Maps API key and customized it with the necessary features for your project. Remember to monitor your API usage through the Google Cloud Console to keep track of any potential billing issues.
Articles You Might Like